leaflitter_color_jhd-a.png
leaflitter_color_jhd-b.png
leaflitter_color_jhd-a.png
Dundjinni is a map-making program produced by Fluid Entertainment. It excels at making adventure maps, including dungeons, buildings, and wilderness settings.
“Dundjinni”, the Dundjinni logo and genie, “Fluid”, and the Fluid logo are trademarks of Fluid Entertainment. I am not associated with Fluid Entertainment or Dundjinni in any way, except as a user of the Dundjinni software. Fluid is not responsible in any way for the contents of this website.
One aspect of Dundjinni is the ability to create and import your own art into the program, for use in conjunction with or instead of the art included with the program. These pages are devoted to techniques used for creating art to be used in this way. This page covers the basics. The tutorials (linked at the top and bottom of this page) cover some specific techniques that I find useful.
Dundjinni uses graphics in the PNG format.
Objects and textures for use in Dundjinni should be scaled to 200 pixels per 5 feet. So, if your object is supposed to be 1 foot across, the graphic should be 40 pixels across. For “Campaign” scale art, the scale is 200 pixels per 200 feet, or 1 pixel per foot.
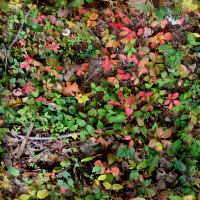
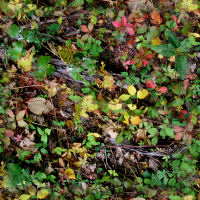
For large area fills, for example the floor or ground, Dundjinni uses tile sets. Each image in the set tiles, which means that if you put it next to itself on any side, there will be no seam. Every tile in the set tiles with every other tile in the set. To let Dundjinni know that a set of tiles go together, give them the same filename, but add -a, -b, etc to each filename. For example, here are two tiles from a set. The first one appears on the left and right of the second. In this case you can see that something has changed but there is no seam line.
|
|
|
leaflitter_color_jhd-a.png |
leaflitter_color_jhd-b.png |
leaflitter_color_jhd-a.png |
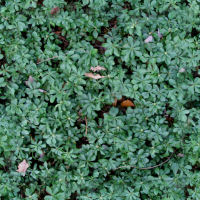
In contrast, here are tiles from different sets. The seam is obvious.
|
 |
|
leaflitter_color_jhd-a.png |
groundcover_jhd-a.png |
leaflitter_color_jhd-a.png |
My Tile Set Tutorial covers the techniques for making tile sets.
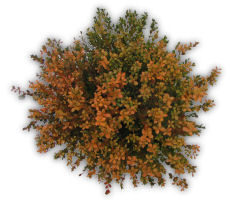
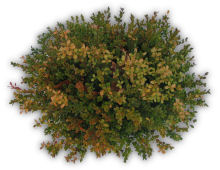
Sometimes you also want to have a set of objects that are related. For example, you may want a set of bushes, all of the same type, but not identical. By using the -a, -b, etc labels on your files (the same as for tiling sets), you can tell Dundjinni that the objects go together. They can then be stamped down randomly to easily add variation to your map. Simply holding down the CTRL key will tell Dundjinni to choose a random object from the set, and place it with a random rotation. Here are three similar but different bushes from a set:
 |
 |
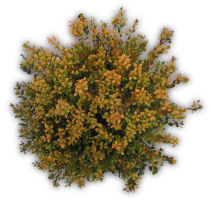 |
bush_fall_jhd-a.png |
bush_fall_jhd-b.png |
bush_fall_jhd-c.png |
However, this only works for Cover, not for Objects. Objects are treated independently, no matter how you name them.
Graphics are square or rectangular, but your objects don't have to be. Dundjinni uses Alpha-Channel transparency to define which regions of your graphic will display, and which will be invisible. Alpha-Channel transparency means that each pixel of your image can range from completely transparent to completely opaque, or anywhere in between. This allows you to create, for example, semi-transparent shadows and lighting effects.
More information on setting up objects with transparency, and saving PNG files with Alpha-Channel transparency in Paint Shop Pro, can be found in the Object Tutorial.
Dundjinni • Tile Set Tutorial • Object Tutorial • Photo Tutorial • Gallery